Setting up Your Own VTS Backend Environment
VTS backend environment is a system of server-side components which allow you to run the backend portion of Melown Tech’s open source VTS 3D Geospatial Software Stack.
If you need to work with an existing VTS map configuration, such as one hosted at Melown Cloud, you don’t need VTS backend environment. If you need to stream from your own servers, on your Intranet, do not want to upload your data to the cloud, or want to make use of VTS features not available in the cloud, this tutorial will tell you what you need to do.
Prerequisites
We presume that you have a clean Ubuntu 18.04 LTS (Bionic Beaver) installation and that your user can obtain superuser privileges via sudo. Any usable VTS installation should have at least 2GB of RAM available. You also need some diskspace, the actual size of it much depends on what you want to use VTS backend for, but a couple of GiBs should be enough to get your started. Both Linode servers and Digital Ocean droplets mid-range configurations will perfectly suit the purpose.
Make sure that port 8070 is open and unonccupied on your system.
Install VTS Backend
Melown Technologies provides a public package repository for VTS backend and installing it is thus straightforward.
Make sure we have HTTPS apt transport available:
$ sudo apt install apt-transport-https
Add Melown Tech’s repository to your sources list:
$ cd /etc/apt/sources.list.d/ && sudo wget http://cdn.melown.com/packages/conf/melown-bionic.list
$ wget -O - http://cdn.melown.com/packages/keys/oss.packages%40melown.com.key | sudo apt-key add -
Update your package lists:
$ sudo apt-get update
And finally, install vts-backend:
$ sudo apt install vts-backend
If all went well, you now have a working VTS backend.
Test Your Setup
VTS backend is capable of generating ellipsoid surfaces out of the box for every reference frame known to it. It is also bundled with some example data and provides powerful introspection capabilities. We may use these to test your installation.
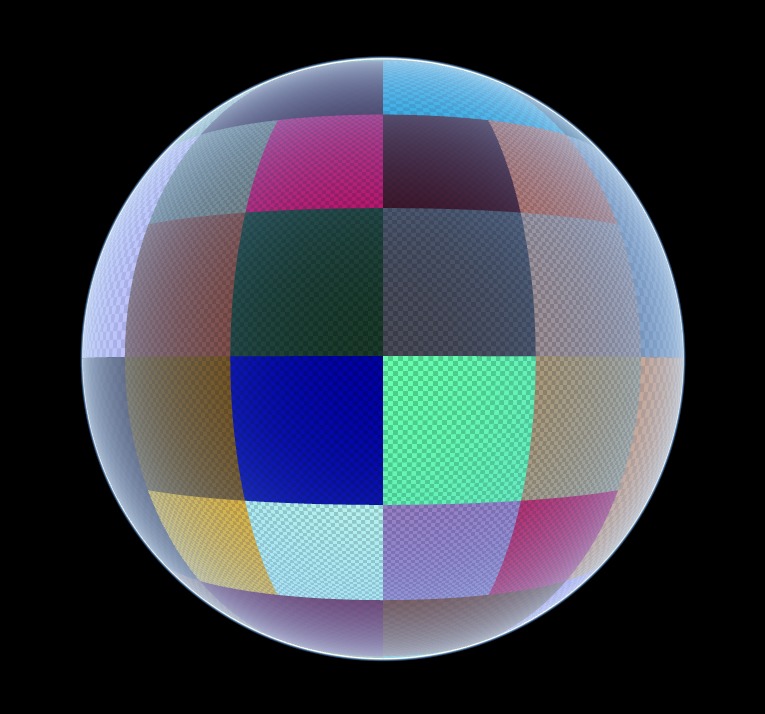
To see the WGS84 ellipsoid with spherical mercator tile hierarchy, simply point your web browser to http://<yourserver>:8070/mapproxy/melown2015/surface/.system/surface-spheroid/. After a little while, you should see something like this:
For your own interactive 3D map of Dachstein, based on SRTM and Geoland basemap.at data, go to http://<yourserver>:8070/mapproxy/melown2015/surface/examples/srtm1-n47-e013/. Here is what the result should look like:
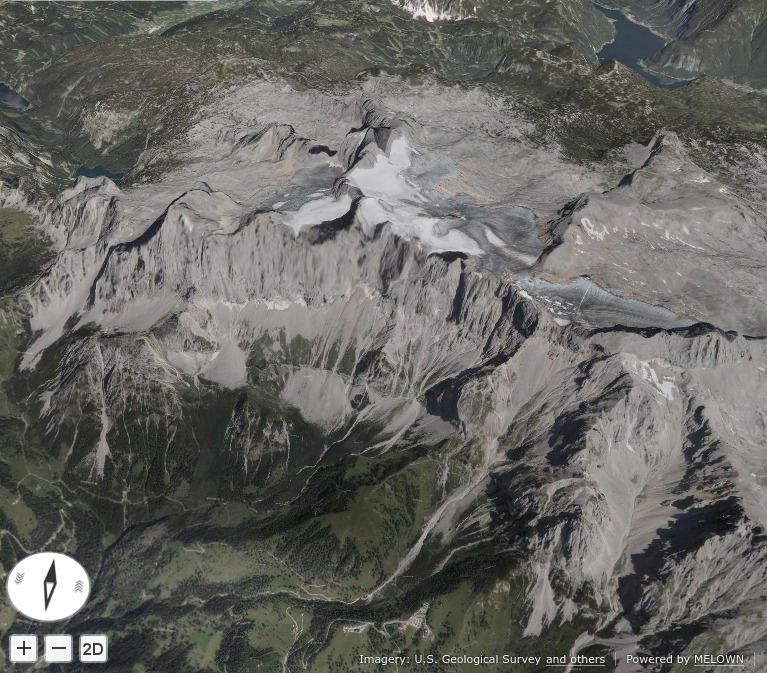
Please note that depending on the speed of your hardware, the initial generation of textured tiles in mapproxy’s cache may take some time.
Under the Hood
Here is some information you might find useful when exploring your fresh related VTS backend environment further.
Your VTS backend environment consists of four components:
- the registry, which holds the definition of coordinate systems and reference frames known to VTS,
- the mapproxy, which provides for on-the-fly generation and streaming of bound layers, surfaces and free layers,
- the vtsd, which is an HTTP server streaming static content from VTS storage
- the tools, which provide tools to create and maintain a VTS storage and interface with it
Additionally, there is an nginx webserver which deals with things such as acceleration via reverse-proxying and may provide useful extras such as http/2 support and SSL termination, if desired.
The key elements of VTS backend data model are
- mapproxy resources, which come in several distinct flavors (tiled 2D map services or TMSes, 3D surfaces or vector geodata),
- storage, which holds pregenerated surfaces for a specific reference frame and integrates surfaces from local or external sources,
- storage view, which upon processing by vtsd, becomes a map configuration, or a blueprint for the virtual world rendered by VTS clients
You may examine the available reference frames at /opt/vts/etc/registry/referenceFrames.json.
Mapproxy resources are defined in /etc/vts/mapproxy/resources.json.
VTS Backend creates a storage for every reference frame in registry during installation. The storage directories are located at /var/vts/store/stage.<referenceFrame>. Stage is merely a traditional name for VTS storage. They are not intended for direct manipulation, use a utility called vts (part of VTS tools) instead.
As a final note, all data files in your VTS backend installation are owned by a system user named vts. If you need to work with them, you should always switch to this user through
sudo -iu vts
Now that you know (almost) everything about your VTS backend, you may want to have more fun with it. Check some of our other tutorials out or even better, use them as inspiration to work with your own data.